

Ever had your WordPress site start acting strangely? Maybe things slow down, error messages pop up, or worse, you suspect something sneaky like malware has wiggled its way in. It’s a scary feeling, but there’s a powerful way to check if the heart of your WordPress installation the core files is healthy, and how to give it a complete refresh without wiping out your precious content.
We’re going to dive into what a checksum is and why verifying it is your site’s health check. Then, I’ll walk you through two fantastic, non-technical ways to fix things up: first, using the super easy cPanel WordPress Manager (or WP Toolkit), and second, using a slightly more advanced but incredibly powerful tool called WP-CLI. Don’t worry, we’ll keep the tech talk minimal and the steps crystal clear.
Part 1: What in the World is a Checksum, and Why Should I Care?
Before we start fixing things, let’s quickly understand the main problem we’re trying to solve.
Your WordPress Core: The Untouchable Files
Think of your WordPress site as a car. It has the engine (the core WordPress files), the paint and interior (your theme), and all the extras like the stereo and navigation (your plugins).
The core files are the engine. They are the original, official files that make WordPress run. Files like wp-config.php and your wp-content folder (which holds your themes, plugins, and uploads) are meant to be unique to your site, but the rest of the core files should be exactly the same as the original ones downloaded from WordPress.org.
The Digital Fingerprint: What is a Checksum?
A checksum is simply a digital fingerprint for a file. It’s a short, unique code (usually an MD5 or SHA hash) that’s calculated based on the entire content of a file.
- If you change even a single character in the file, its checksum changes completely.
- The official WordPress team publishes the correct checksums for every single core file in every version of WordPress.
Why verify it? Because when your site gets hacked or a file gets corrupted during a messy update, the bad guys often change a few lines of code in one of those core files. By verifying the checksum, you’re asking the tool to compare the digital fingerprint of the file on your server to the official, safe fingerprint from WordPress.org.
If they don’t match, it means that file has been modified and that’s a huge red flag that something is wrong.
Part 2: The Easy and Recommended Way – Reinstalling Core with cPanel WordPress Manager
If your hosting provider gives you cPanel and it has the WordPress Manager (sometimes called WP Toolkit), this process is a breeze. It’s like hitting a single “Fix It” button.
Safety First: Create a Backup
Even though reinstalling the core files shouldn’t touch your content, themes, or plugins, you should always create a full website backup before performing any major site surgery. Most cPanel WordPress Managers have an easy-to-use backup function, or you can use a plugin like UpdraftPlus or your host’s manual backup tool. Seriously, don’t skip this.
Step-by-Step Guide (Method 1: cPanel)
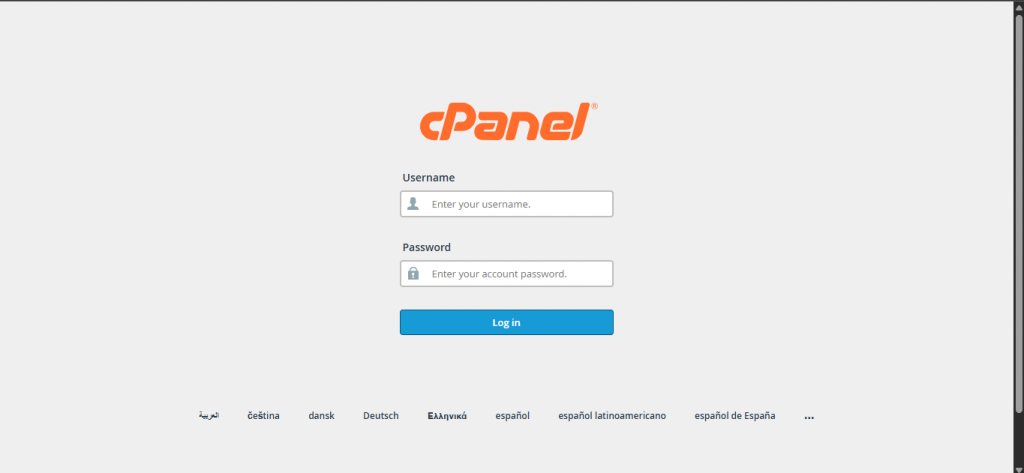
Step 1: Log Into Your cPanel
Go to your web host’s portal or type your domain name with prefix cpanel (e.g., cpanel.yourdomain.com) and log in with your credentials.
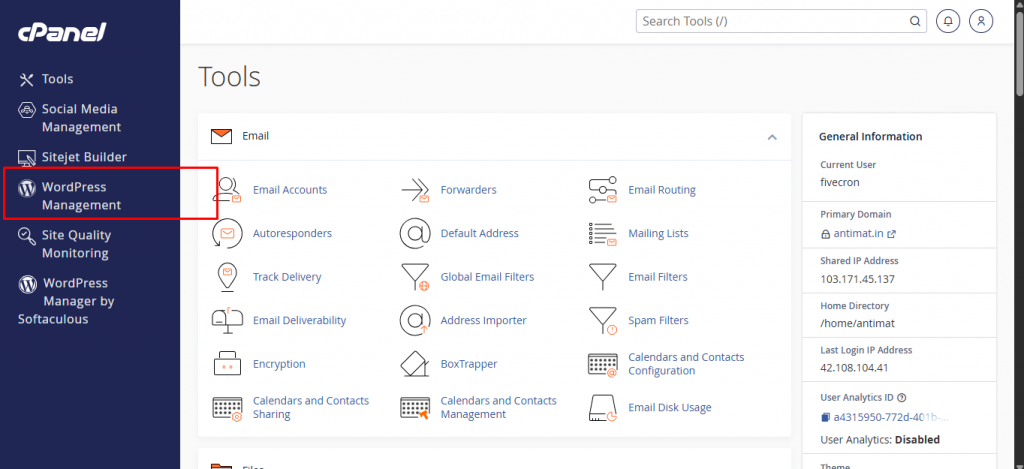
Step 2: Find the WordPress Manager/WP Toolkit
Once inside cPanel, look for WordPress Management in sidebar.
Step 3: Select Your WordPress Installation
The WordPress Manager will show you a list of all the WordPress sites on your hosting account.
1. Find the domain you need to fix.
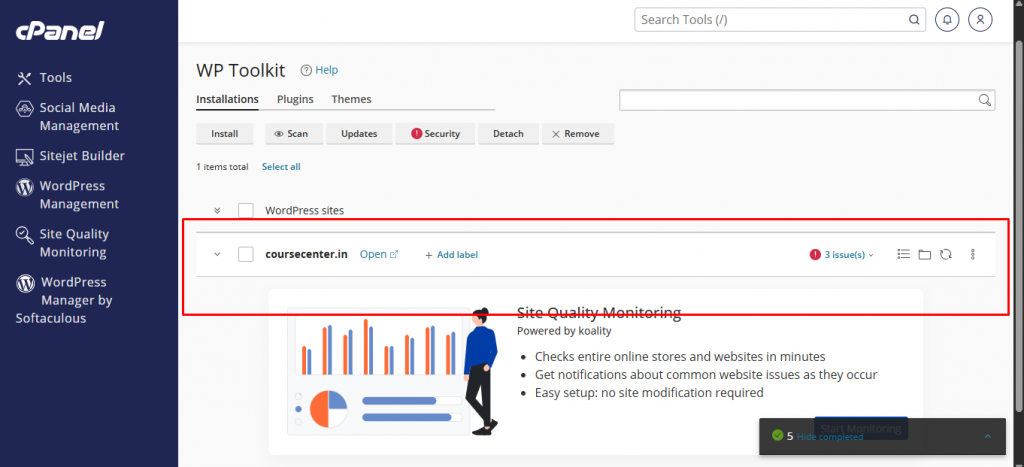
2. Click on the “Manage” or “Details” button next to that site to expand the options.
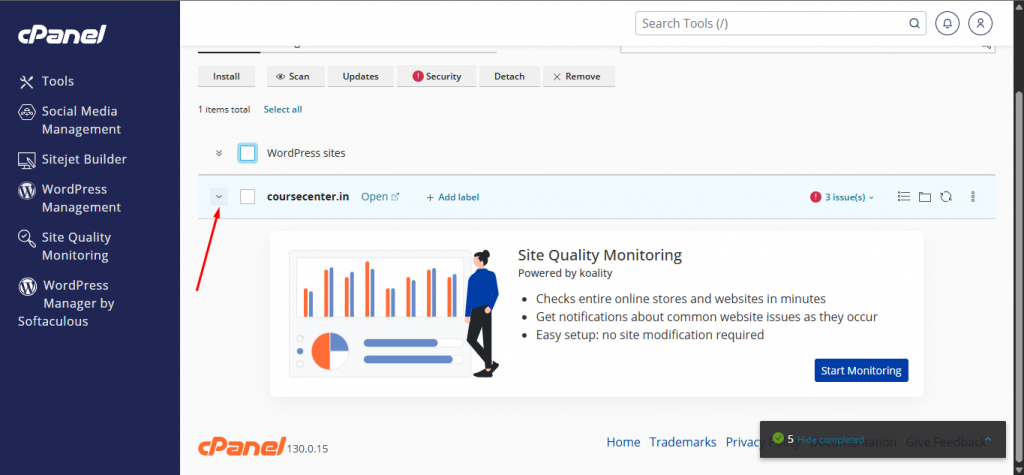
Step 4: Verify the Checksums
Inside the management area for your site, look for a tool, button, or section labeled something like:
- Check WordPress Integrity
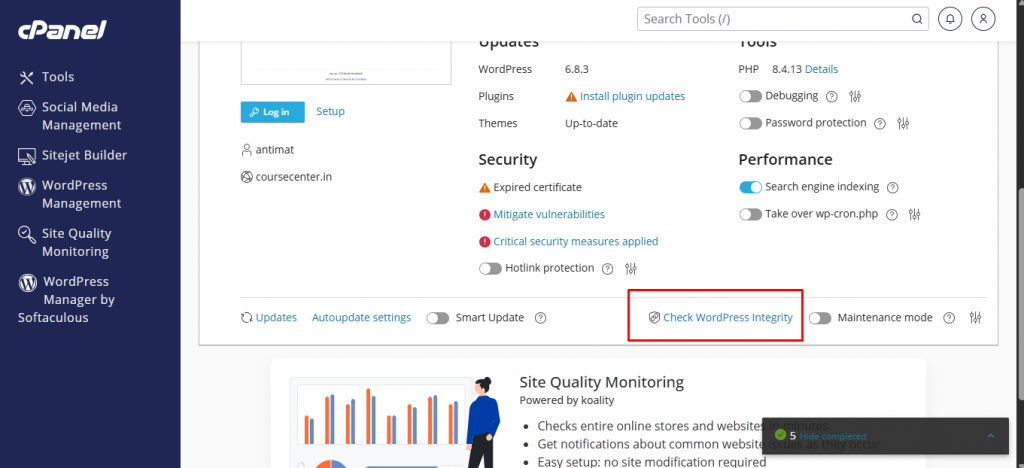
Click it. A new window or section should pop up.
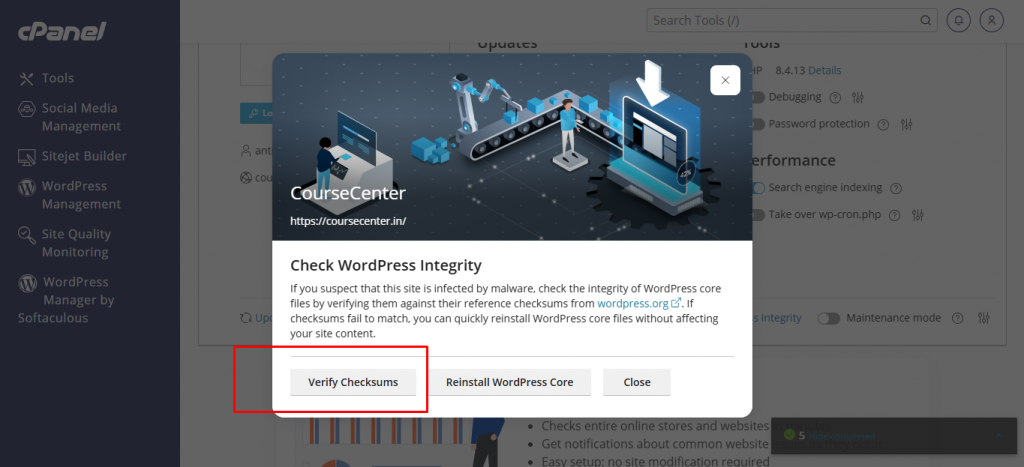
- Find and click the “Verify Checksums” button.
- The tool will then communicate with WordPress.org and compare your files.
- If everything is good: You’ll get a success message like, “WordPress installation verifies against checksums.” 🎉
- If a problem is found: The tool will report a failure and likely give you a big, friendly button to fix it.
Step 5: Reinstall the WordPress Core Files
If the checksum failed, you need to replace the compromised files with clean, official ones.
1. In the same “Check WordPress Integrity” area, look for the option:
- Reinstall WordPress Core
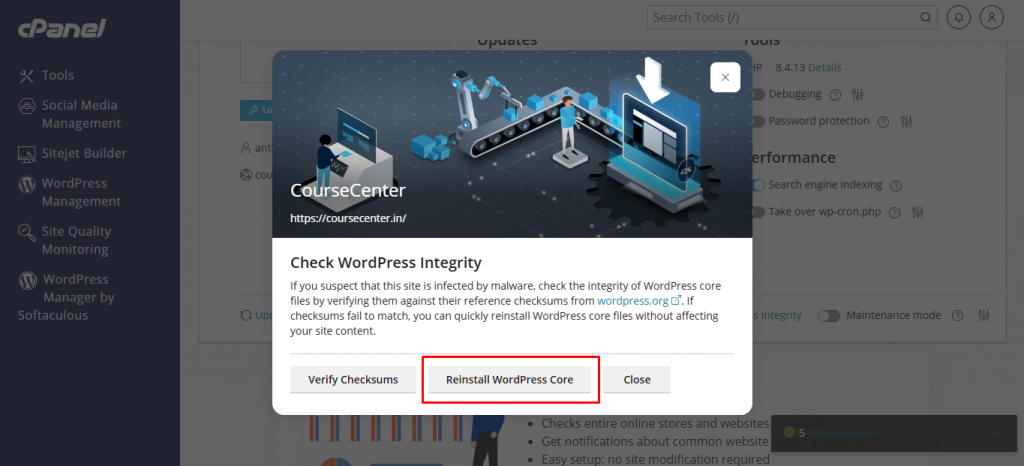
2. Click the button. A final confirmation box will pop up.
3. Read the warning (it should confirm that your content, themes, and plugins will not be affected, only the core WordPress files).
4. Click “Reinstall” or “Confirm”.
The cPanel tool will automatically download a fresh copy of the official WordPress core, delete the suspicious files on your server, and replace them with the clean ones. Once it’s finished, you’ll get a success message.
Step 6: Test Your Website
Clear your browser cache and visit your website. Everything should look and function normally, but now you have the peace of mind knowing the engine of your site is running on clean, official parts!
Part 3: The Powerful Way – Reinstalling Core with WP-CLI
WP-CLI (which stands for WordPress Command Line Interface) is a way to manage your WordPress site using text commands instead of clicking buttons in a browser. It’s like having a super-fast, secret control panel.
Don’t let the word “command line” scare you! We’re only going to use a couple of simple commands. This method is often the preferred choice for developers and for fixing sites where the main dashboard isn’t even accessible.
We have two main scenarios for using WP-CLI: one where your hosting has it readily available in cPanel, and another for those with a dedicated VPS (Virtual Private Server).
Method 1 – Using WP-CLI Directly in cPanel ( Easy For Shared Hosting )
Many modern hosts make the command line available right inside cPanel.
Step 1: Access the Terminal in cPanel
1. Log into your cPanel.
2. In the search bar at the top, type “Terminal” and click on the icon that appears.
A new tab will open with a black screen this is the Terminal. It’s where you type commands. It will look intimidating, but you’ll only need a few lines!
Step 2: Navigate to Your WordPress Folder
You need to tell the Terminal which WordPress site you want to work on. Your main website is usually in the `public_html` folder.
Type this command and hit Enter:
cd public_html
cd just means “change directory” (change folder).
If your site is in a subfolder (like public_html/blog), you would type cd public_html/blog instead.
Step 3: Verify the Checksums
This is the magic command to check the digital fingerprints:
Type this command and hit Enter
wp core verify-checksums
wp means “start the WP-CLI tool.”
core verify-checksums is the specific instruction to check the main WordPress files.
The result will be one of two things:
1. Success: You’ll see a line like: Success: WordPress installation verifies against checksums. (All good! You can close the Terminal.)
2. Failure/Warning: You will see a list of files that do not match the official checksums. This means those files are modified and likely corrupted or malicious.
Step 4: Reinstall the Core Files
If the verification failed, you’ll use the simple reinstall command. This command is designed to replace the core files without touching your unique files like wp-config.php, your themes, plugins, or images.
Type this command and hit Enter:
wp core download --force
wp core download tells the tool to download the latest, clean core files from WordPress.org.
--force tells it to overwrite the existing files, including the modified or corrupted ones, essentially cleaning up the mess.
Wait a moment. You’ll see a message like: Success: WordPress core downloaded.
That’s it! Your WordPress core has been completely replaced with a fresh, clean copy. You can now close the Terminal and test your site.
Method 2 – Using WP-CLI on a VPS (The SSH Method)
If you have a VPS (Virtual Private Server) or a dedicated server, you might not use the cPanel Terminal, but instead connect directly using a separate program like PuTTY (for Windows) or the built-in Terminal (for Mac/Linux). This connection method is called SSH.
The steps inside the Terminal are almost identical, but getting into the server is slightly different.
Step 1: Connect to Your Server via SSH
You’ll need your:
- Hostname (usually your IP address or server name)
- SSH Username (often `root` or your cPanel username)
- SSH Password (or an SSH Key)
1. Open your SSH client (e.g., PuTTY or Terminal).
2. Enter the connection command, usually in the format: ssh username@hostname and hit Enter.
3. Enter your password when prompted.
Step 2: Navigate to Your WordPress Folder
Once logged in, you need to find the specific folder where your website is stored. For a VPS, this location can vary, but it’s often something like /var/www/html/yourdomain.com/public_html.
You’ll use the cd command again. You might have to use a couple of commands to get to the right spot. For example:
cd /var/www/html/yourdomain.com/
You must be in the folder that contains the wp-config.php file.
Step 3: Verify Checksums and Reinstall Core
Now you use the exact same WP-CLI commands as in the cPanel method:
To Verify Checksums:
wp core verify-checksums
To Reinstall the Core Files:
wp core download --force
The process and the success messages are identical. This method gives you the highest level of control over your server.
Conclusion: Clean Up and Move On
Dealing with a corrupted or potentially compromised WordPress core can be stressful, but as you’ve seen, the fix is much simpler than you might think. Whether you prefer the gentle click of the cPanel WordPress Manager or the power and speed of the WP-CLI commands, you now have the tools to verify your site’s integrity and give its heart a clean, fresh start.
Remember the golden rule: Always back up first! By keeping your core files clean and verified, you are taking a crucial step in maintaining a fast, stable, and secure website. Now go ahead and enjoy your clean, healthy WordPress site!


Share Your Comments & Feedback